Fix for ebtables errors during update WSL ubuntu 18.04

  • Credit to russalex: https://github.com/Microsoft/WSL/issues/143#issuecomment-209072634
  • Credit to nuclearmistake: https://github.com/Microsoft/WSL/issues/143#issuecomment-209075558
sudo vim /usr/sbin/policy-rc.d
Put this in the file:

#!/bin/sh
exit 101

save it then:

sudo chmod +x /usr/sbin/policy-rc.d
sudo dpkg-divert --local --rename --add /sbin/initctl
sudo ln -fs /bin/true /sbin/initctl

Golang, QT Binding, Gocode, VSCode, in Windows 10 Oh My

Ok, so this will be a long series of posts but I was stubborn and I really wanted a particular setup to work.

Wanted / Goal:

  • I wanted to code a large cross platform desktop project in go.
  • I wanted to use QT for the GUI
  • I wanted to do primary development in a windows 10 environment (as this is the platform I am usually sitting at)
  • I wanted to use VSCode for development editor

Initial problems:

  • There are several experiments for cross platform GUI either in native go, or with go bindings.  The short list of what I researched is electron via go-thrust, wx, shiny, gxui, walk, andlabs, several of these have or have had potential, most sort of atrophied over time as cross platform GUI = Hard, I settled eventually on QT but only because the binding work by therecipe available here is both current, and exceptionally well integrated.
  • Using the default QT binaries at the time 5.70 while it work well in linux, os x, for windows the delivered opensource binaries were only the 32bit version, and while therecipe’s build system handled this well even with a 64 bit golang, he cross compiled automagically, but you of course ended up with a 32bit application.
  • Additionally the go tool gocode that handles the service piece that does the intellisense magic for VSCode, wouldn’t handle in the editor having a default go for amd64 while introspecting into x86 binaries.  I just couldn’t get to work with a go application compiled down to x86 when the default was amd64, etc. So I wasn’t getting any of the intellisense type of stuff.
  • This becomes a particular pain point because the QT libraries themselves are massive, and the strongly typed binding magic makes coding difficult when you have to constantly open up other source files to search for methods, parameters etc.
  • What really needed to happen was having a 64bit version of the QT libraries as well as a gcc that would build and bind with go toolchains for all amd64.
  • Building windows version of Qt from source is particularly challenging, and most info for windows building is either about doing so with Visual Studio or the mingw32 builds that they already binaries for, that won’t work for my goal.
  • I don’t even think a Visual Studio build of Qt would work binding to Go IMHO, stuff about SEH, DWARF, SJlJ, and probably a bunch of other letters keep getting in the way 🙂
  • Finding picking, and getting Qt to build with things like mingw64, TCC-64, Qt64-NG, the project etc. seemed like a real challenge as the efforts again had atrophied, or the build process was for older versions of Qt, etc.

Therecipe eventually offered an MSYS2 parameter in his build setup, and utilizing this is where I finally made some traction on my goals of a decent setup in windows where the intellisense stuff works etc.  And while Therecipe gives instructions on using msys2 there where some extra steps along the way to get it all to work.  An additional advantage is the current, as of this post, version of QT building on the MSYS2 64bit environ is 5.8 (the latest).

Steps taken overview:

Here is an outline of each of the posts I’ll do about this setup.  Feel free to jump around, but I have only tested this by doing this in order:

  1. Installing regular golang binary in windows 10 and setting up path environments.
  2. Installing MSYS2, updating, installing build tools, and toolchains, and Qt 5.8 64 bit
  3. Configuration of Golang with MSYS2 MingW64
  4. Installing thereciepe QT Bindings
  5. Installing VSCode and Go extensions and setting up integrated terminal


Installing MSYS2, updating, installing build tools, and toolchains, and Qt 5.8 64 bit

  1. Visit this site: http://www.msys2.org/
  2. Download this installer msys2-x86_64-20161025.exe it might be newer version but you want the x86_64 one, but it will be updated by the end of this process to the latest anyway.
  3. Note the 64 bit installer will let you have both 32 and 64 bit toolchains, however for this post I am just concentrating on 64 bit
  4. I kept the default install location of c:\msys64
  5. After installing you should end up with an MSYS Terminal window open
  6. Update the software now by
    1. entering pacman -Syuu at the prompt
    2. Say Y to proceed with installation.
    3. You will then get a warning to close the terminal window, do that!
    4. Restart MSYS from windows start menu you want MSYS2 MSYS for this part (There are also options of MSYS2 Mingw64 bit, and MSYS2 Mingw32 bit, but those are for later when using the build toolchains.
    5. At the reopened window again enter pacman -Syuu and again say Y to proceed.
    6. Possibly repeat step 5 until it tells you there is nothing left to update.
  7. Install development software that we will need for our MSYS MingW64 environment, each time choosing y and default to all, there might be a lot of extra installed compilers and stuff here, but this worked for me.  And its all fun to play with 😉
    1. pacman -S git
    2. pacman -S svn
    3. pcaman -S base-devel
    4. pacman -S msys2-devel
    5. pacman -S mingw-w64-x86_64-toolchain
    6. pacman -S mingw-w64-x86_64-qt-creator mingw-w64-x86_64-qt5
    7. pacman -S mingw-w64-x86_64-cmake mingw-w64-x86_64-clang
    8. pacman -S vim
      1. Note vim might already have been installed as a dependency of git.
  8. exit the terminal window
  9. From now on if we are working on something to configure / test / compile, etc you will use the MSYS2 Mingw64 terminal available from the start menu
  10. Verify that Qt is installed and working by opening the MSYS2 Mingw64 terminal and running qtcreator & 
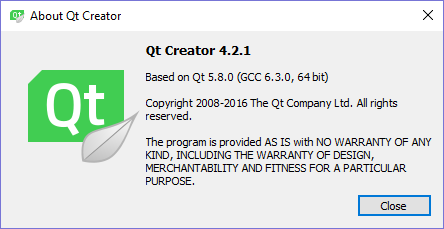
  11. Under Qt Creator Help / About Qt Creator you should see something like “Based on Qt 5.8.0 (GCC 6.3.0, 64bit)”

So if golang and now msys2 and qt are installed we need to configure things to work together.

Configuration Golang and MSYS2 MingW64


  1. Add to Windows Path so that go knows where gcc is
    1. C:\msys64\mingw64\bin
  2. Add a new Environment Varible to Windows
    1. QT_MSYS2=true
  3. Add to MingW64 Terminal
    1. .bashrc file
      1. Add two lines at the bottom like so:
      2. export GOPATH=”/c/gowork”
      3. export PATH=”/c/Go/bin:$GOPATH/bin:$PATH”
    2. .profile
      1. GOPATH=”/c/gowork”
      2. PATH=”/c/Go/bin:$GOPATH/bin:$PATH”
  4. After restarting MSYS2 MingW32 terminal you should now be able to see Go with:
    1. go version

TypeScript musings

So I frequently use a JavaScript routine like this:

var vars = [], hash;    
var q = document.URL.split('?')[1];    
if(q != undefined){        
    q = q.split('&');        
    for(var i = 0; i < q.length; i++){            
        hash = q[i].split('=');            
        vars.push(hash[1]);            
        vars[hash[0]] = hash[1];        
    }
}

So let’s see what we can do with this in the world of TypeScript. Goals here:

  • Add some type safety declarations
  • Drop it in a module
  • Update it a little as this was a really old snippet in JavaScript land.

So starting with the hash map and creating a class in typescript:

class QParams {
    vars: { [field:string]:string; };  // A Typescript Hashmap
    qstr: string;

    constructor() {
        this.qstr = document.URL.split['?'][1];
        if (this.qstr != undefined) {
            // Here I wanted to pause because in the original javascript
            // q was overwritten from a string to an array of strings
        }        
    }
}

Now reorganized and add a few more bits for the extra array:

class QParams {
    paramhash: { [field: string]: string; };  // A Typescript Hashmap
    params: string[];
    qstr: string;

    constructor() {
        this.qstr = document.URL.split['?'][1];
        if (this.qstr != undefined) {
            this.params = this.qstr.split('&amp;');
            for (var i: number; i &lt; this.params.length; i++) {
                var pair = this.params[i].split('=');
                this.paramhash[pair[0]] = pair[1];
            }            
        }
    }
}

Then run this through the typescript compiler produces this javascript:

var QParams = (function () {
    function QParams() {
        this.qstr = document.URL.split['?'][1];
        if (this.qstr != undefined) {
            this.params = this.qstr.split('&amp;');
            for (var i; i &lt; this.params.length; i++) {
                var pair = this.params[i].split('=');
                this.paramhash[pair[0]] = pair[1];
            }
        }
    }
    return QParams;
})();
//# sourceMappingURL=qparams.js.map